

How To Find and Download Facebook Ad Receipts?
Running Facebook Ads can be a powerful tool for businesses of all sizes. But with great advertising power comes great responsibility…to keep track of your budget! Fortunately, Facebook Ads Manager makes it easy to find and download facebook ad receipts for your ad campaigns. This article will guide you through the process of accessing your Facebook ad receipts and explain why they're important.
Why Do You Need Your Facebook Ad Receipts?
There are a few key reasons why you should keep your Facebook ad receipts handy:
● Record Keeping and Budgeting: Receipts provide a clear record of your ad spend, making it easier to track your advertising budget and analyze the return on your investment (ROI).
● Tax Purposes: For tax filing purposes, ad expenses may be considered a business deduction. Having receipts readily available come tax season saves you time and ensures you have proper documentation.
● Expense Reporting: If you work with a client or manage multiple ad accounts, receipts provide a clear breakdown of spending for each campaign.
Finding and Downloading Your Facebook Ad Receipts
Here's how to access your Facebook ad receipts:
- Log in to Ads Manager: Head over to Ads Manager (https://business.facebook.com/) and log in to your Facebook advertising account.
- Navigate to Billing: Once logged in, locate the "Billing" section within Ads Manager. This is usually found under the "Settings" menu.
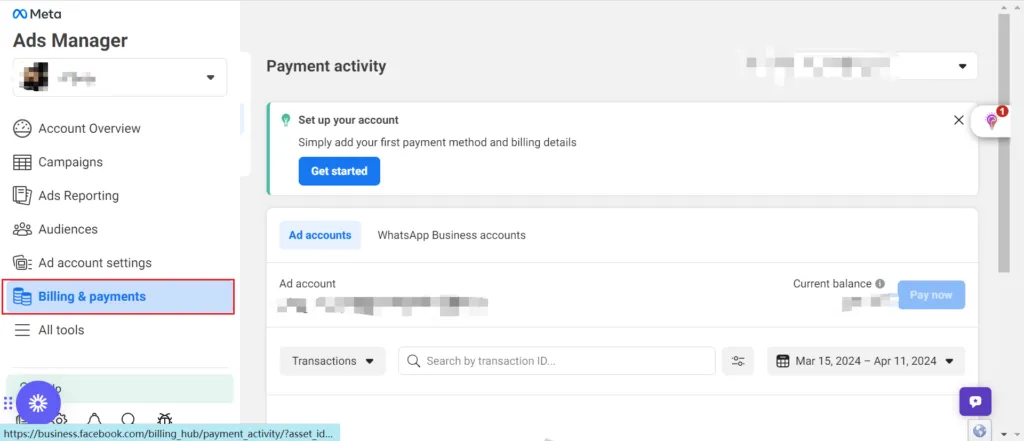
- View Invoice History: Within the billing section, you'll find your "Payment Activity" This section displays a record of all your ad billing transactions.
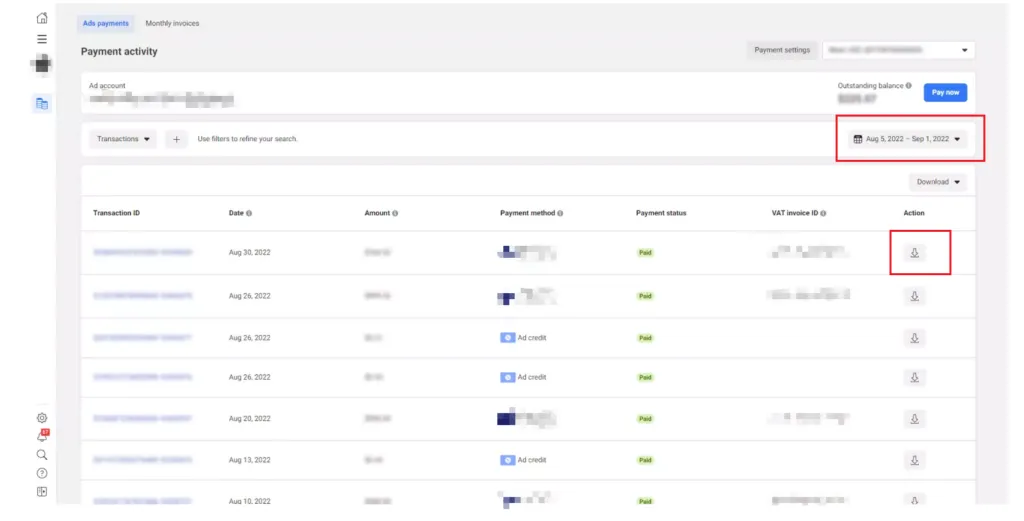
- Filter and Download: You can use the date filters to narrow down the timeframe for which you want to see receipts. To download a specific receipt, simply click the download icon next to the desired transaction.
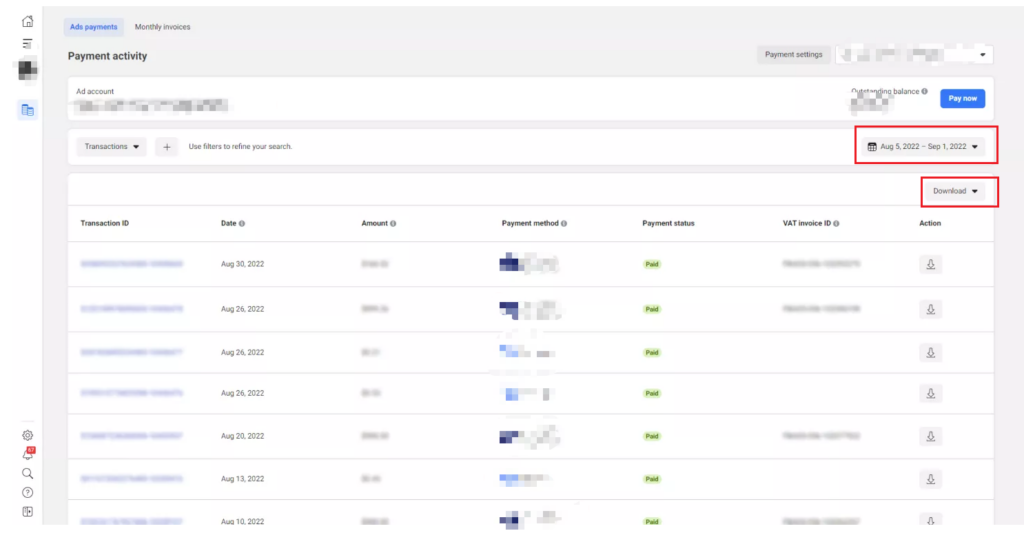
Download All Transactions or Reports:
If you want to download all transactions, choose your date range and click the "Download" button above the table. This lets you download a single PDF receipt for all transactions, or a billing report in PDF or CSV format.
Understanding Your Facebook Ad Receipt Data
● Payment Status: "Paid" signifies ad spend, while "Funded" indicates money added to your account.
● Clicks/Impressions Discrepancy: Don't panic if your receipt shows a different number of clicks/impressions than Ads Manager. The receipt reflects what you're charged for, while Ads Manager displays total impressions/clicks received.
Facebook Ad Monthly Invoicing
Facebook, recognizing the needs of businesses, offers a convenient solution: Monthly Invoicing. This service consolidates your charges into a single monthly invoice, streamlining your financial records and easing administrative burdens. Here’s a comprehensive guide on how to apply for and utilize Facebook’s Monthly Invoicing feature.
Benefits of Monthly Invoicing
By embracing Facebook’s Monthly Invoicing, businesses can enjoy several benefits:
● Simplified Record-Keeping: Consolidating charges into a single monthly invoice enhances financial transparency and simplifies record-keeping processes.
● Improved Cash Flow Management: Predictable monthly invoicing facilitates better cash flow management, enabling businesses to allocate resources strategically.
● Enhanced Efficiency: By reducing the frequency of payments, Monthly Invoicing saves time and minimizes administrative efforts, allowing businesses to focus on core objectives.
Eligibility and Application Process
To be eligible for Facebook’s Monthly Invoicing, you must meet specific criteria:
● Admin/Finance Editor Role: Ensure that you hold either an Admin or Finance Editor role within your Business Manager account.
● Minimum Ad Spend: Maintain a consistent minimum ad spend of $10,000 per month for the last three months.
Once you meet these prerequisites, you can proceed with the application process.
Applying for Monthly Invoicing
To apply for Facebook’s Monthly Invoicing, follow these steps:
Via Business Manager Homepage:
● Navigate to the Home Page: Log in to your Business Manager account and locate the "Now You Can Apply for Monthly Invoicing" section.
● Follow On-Screen Instructions: Click on the designated section and adhere to the on-screen instructions to initiate your application.
Through Payment Methods Section:
● Access Payment Methods: Within your Business Manager, go to the "Payment Methods" section.
● Add New Payment Method: Click on "Add," then select "Add a New Payment Method."
● Request Monthly Invoicing: Opt for "Request Monthly Invoicing" to begin the application process.
Adding Monthly Invoicing as the Primary Payment Method
After successfully applying for Monthly Invoicing, make it your primary payment method to streamline your transactions further. Here’s how:
● Access Payment Settings: Head to the Payment Settings within Ads Manager.
● Add Payment Method: Click on "Add Payment Method".
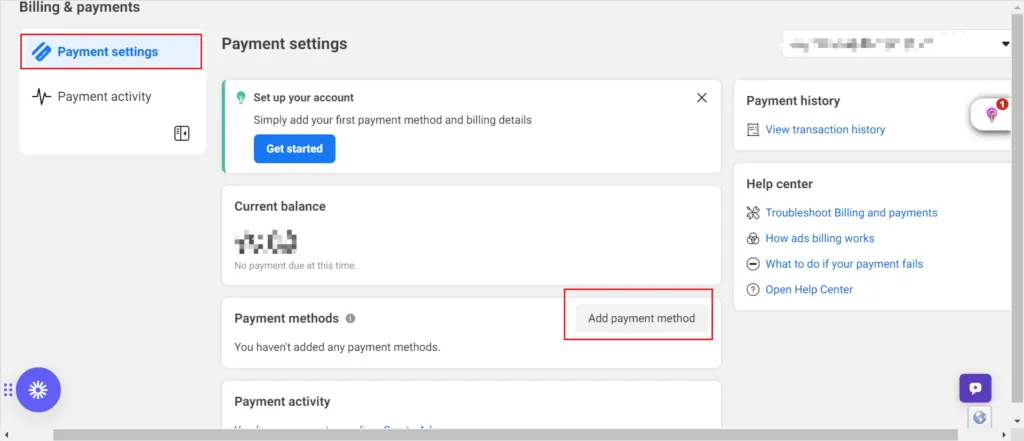
● Choose Business Manager Payment Method: Opt for "Payment Method from Business Manager" and proceed by clicking "Continue."
● Select Monthly Invoicing Option: Choose the desired monthly invoicing option that suits your business requirements.
● Set as Primary: Finally, click on "Make Primary" to designate Monthly Invoicing as your primary payment method for Facebook ads
In conclusion, effectively managing your Facebook advertising budget is crucial for the success of your marketing efforts. By keeping track of your expenses through Facebook ad receipts, you ensure financial transparency, facilitate budgeting, and simplify tax filing processes. By following the steps outlined in this article, businesses can harness the power of Facebook Ads while maintaining control over their advertising budget and financial records.